|
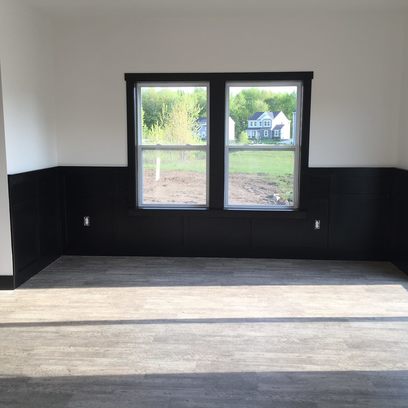
Buying a new home is always a tumultuous and frustrating process whether you have the clandestine budget of a godfather or modest budget of most. It's further still exhausting to go through the process of building a new home, especially through a developer which have set floor plans and only items you can select through their process. We began our home building process about 14 months ago when we sold our condo and moved into an apartment that felt like living in a garbage pail painted with "nice paint". At that point, we had spoken with a developer that built houses very quickly (6 months or so) but realized they were out of our budget if we didn't desire to be house poor. So our next step was to find a different developer, which we did. Unfortunately, their time line was much longer (9 months) and by the time the house was actually done, it was 12 months (cold winters do more than dry out our skin, you know). One thing to consider when building with a developer is that while they may offer a lot of attractive options for a home, everything costs another dime. With a base price of $281,000, all the selections you may want to be more than a base model of the home (side-load garage, better siding colors, alternate floor plan, granite counter tops, etc.) can bring the price up $50k - $80k! Since Holly and I are handy and also willing to do the work, we left many items in the house at base price rather than pay their expensive premium pricing. For example, one room of wainscoting through the builder could be as much as $500 but it cost us about $40 in materials and one day of work. I'll do another blog post on wainscoting in the future. In the end, the items we upgraded through the builder were: side-load garage, granite counter-tops, alternate floor plan (which moved the dining room from the front of the house to the back which made the kitchen significantly larger), vinyl (yes...VINYL flooring) throughout the entire home, canned lights over the kitchen, and craftsman style molding around all doors and windows. With only those items done we knew we had a lot to do:
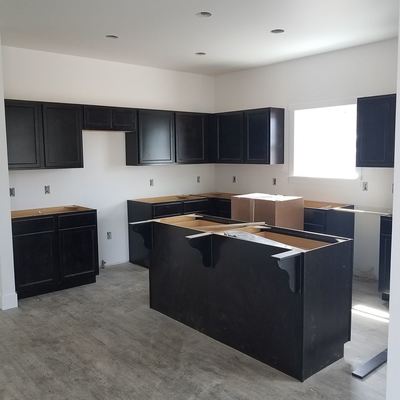
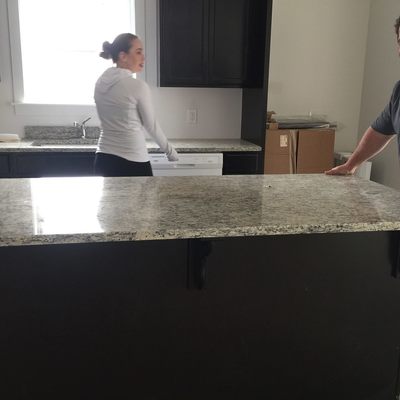
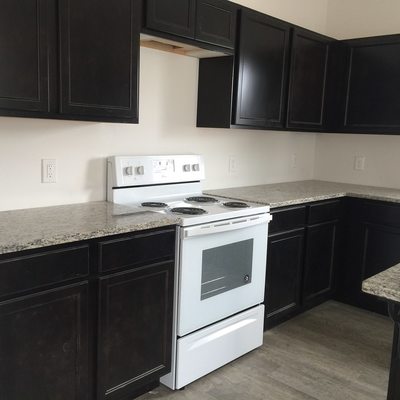
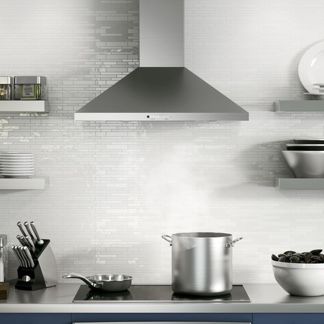
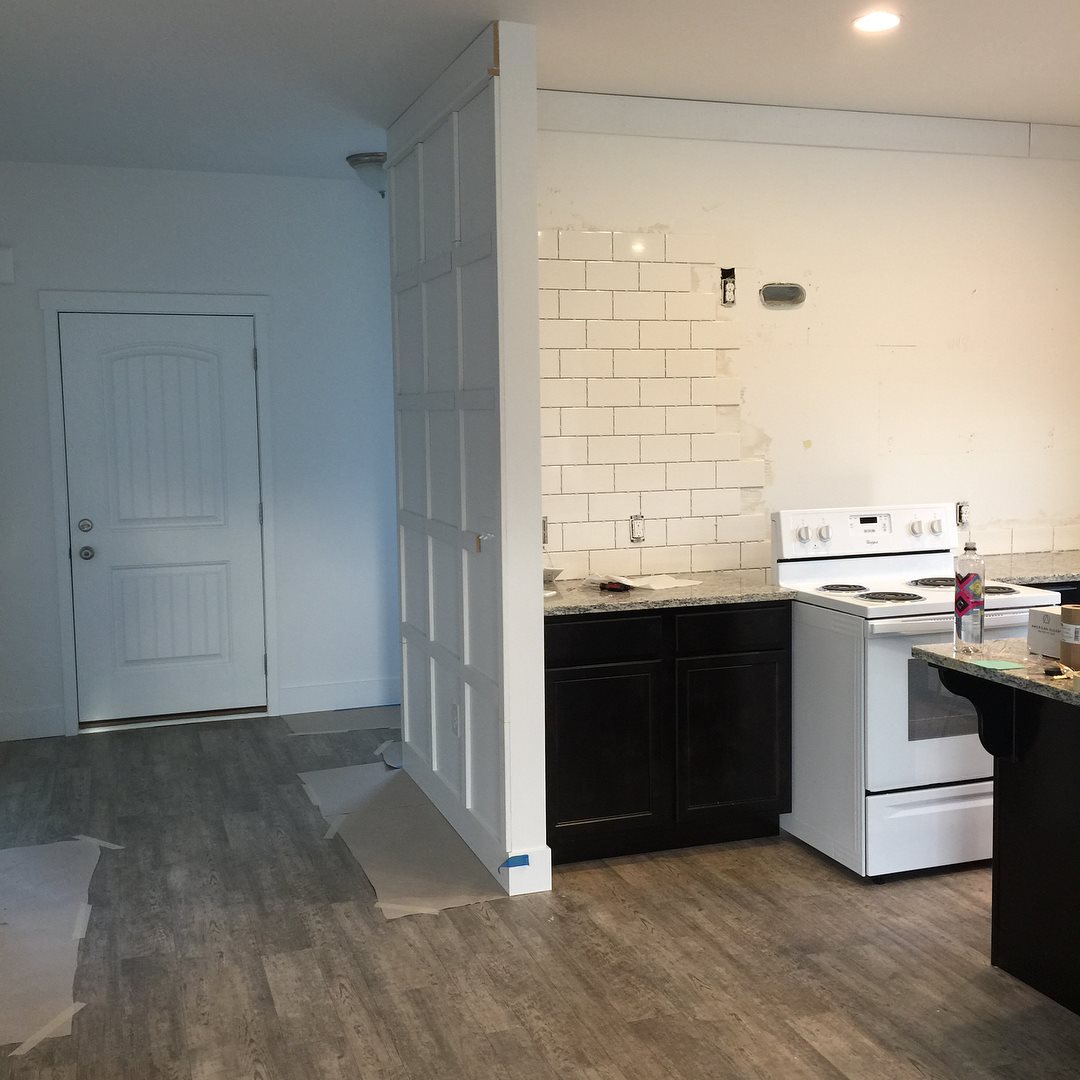
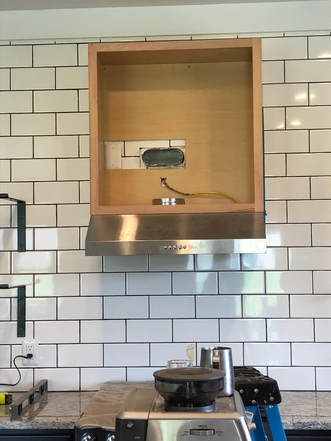
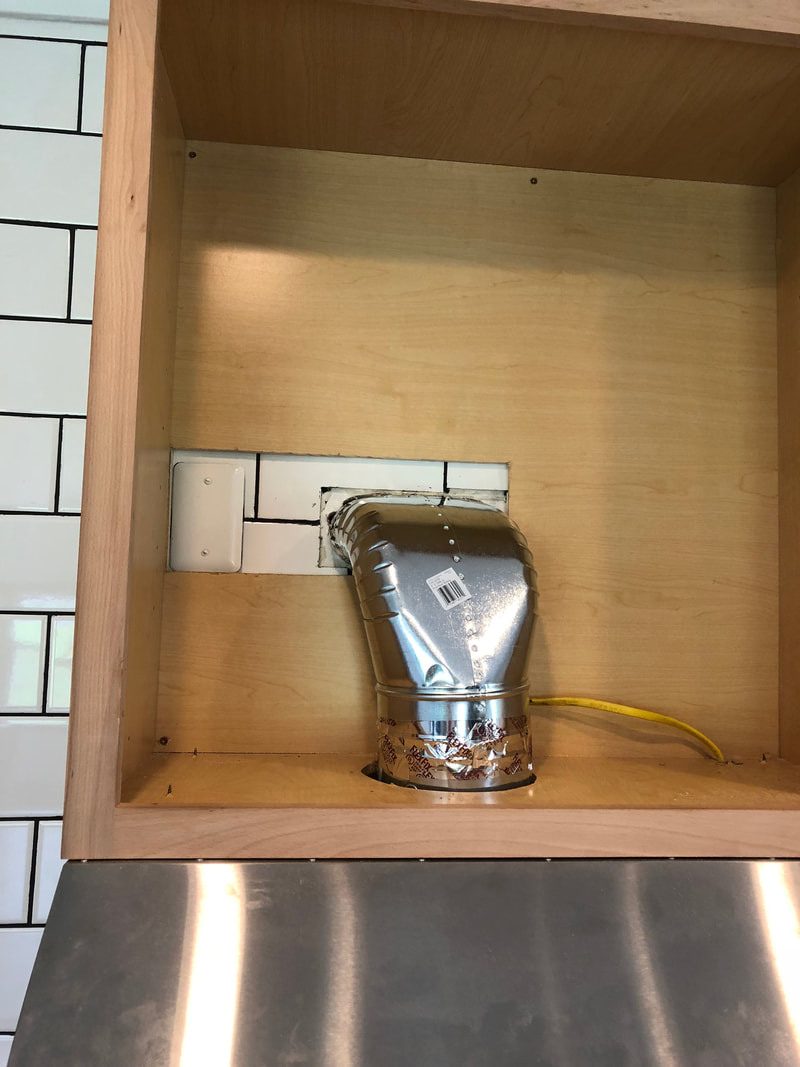
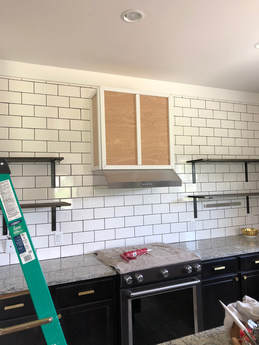
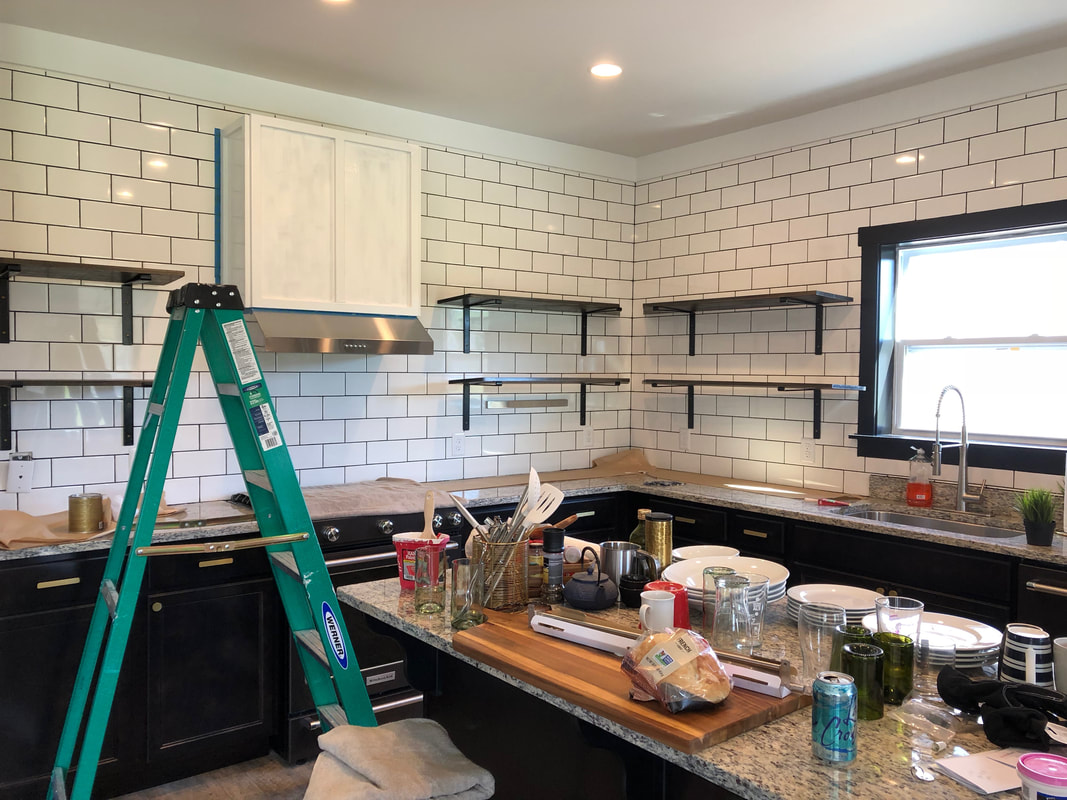
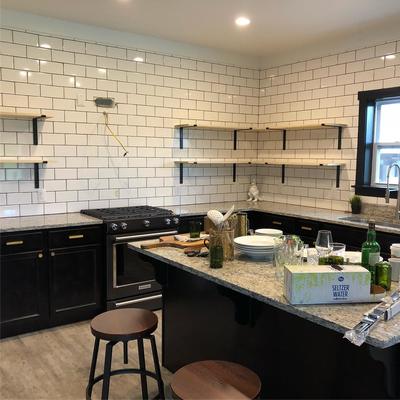
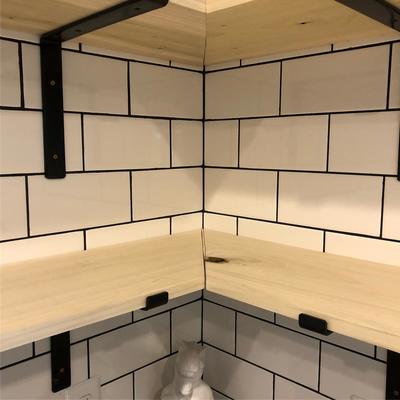
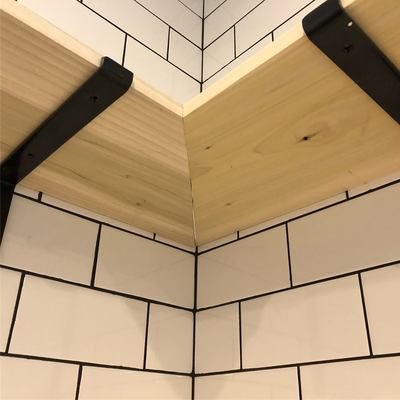
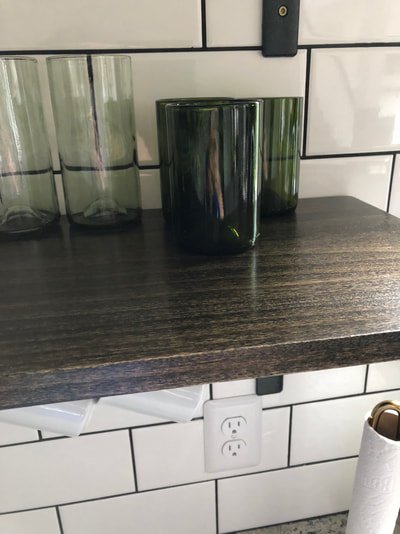
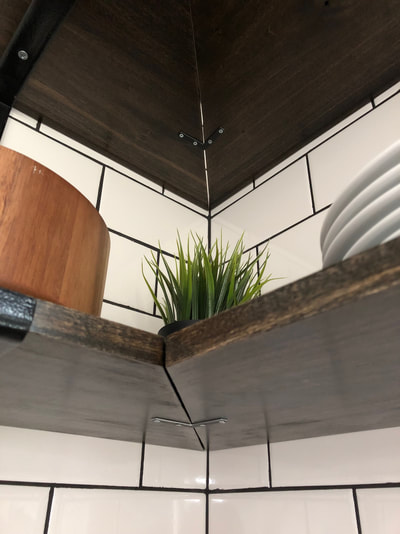
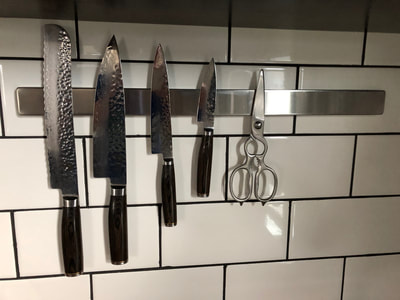
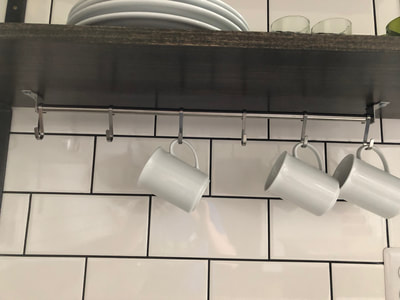
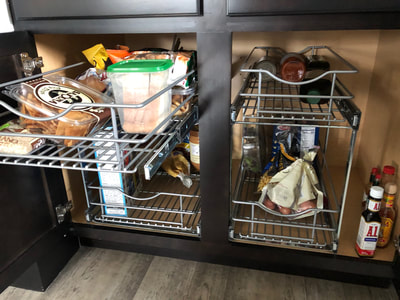
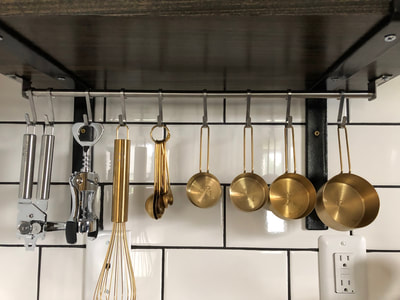
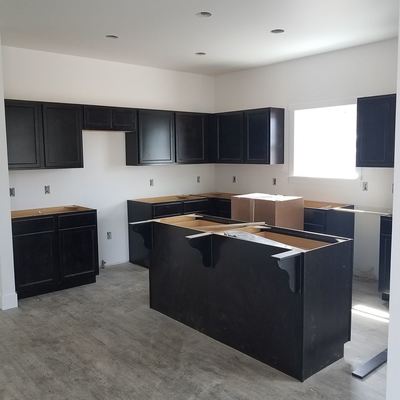
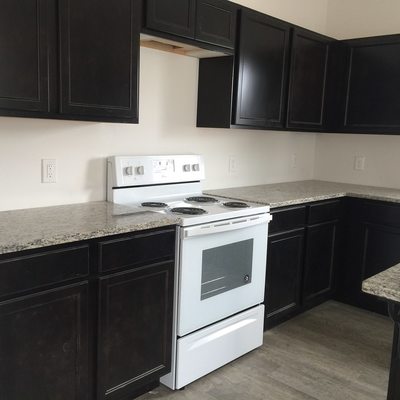
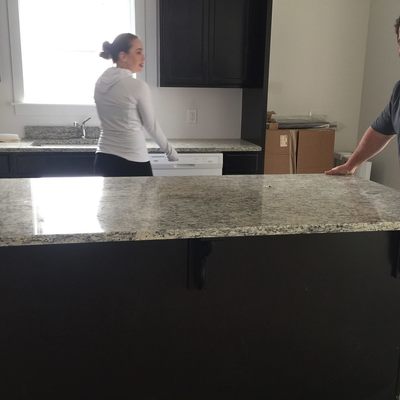
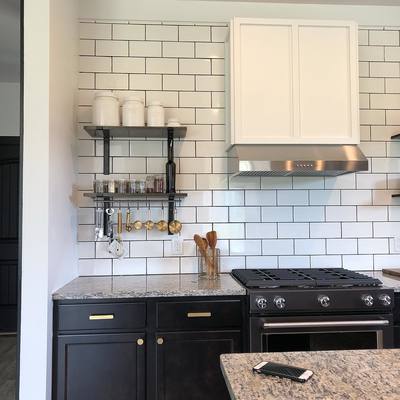
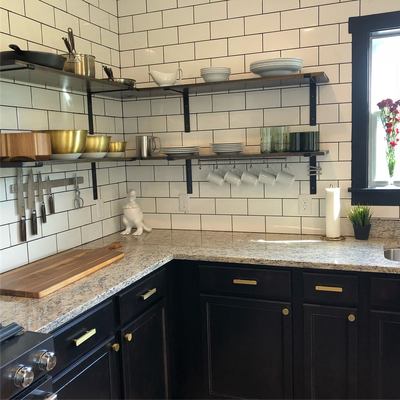
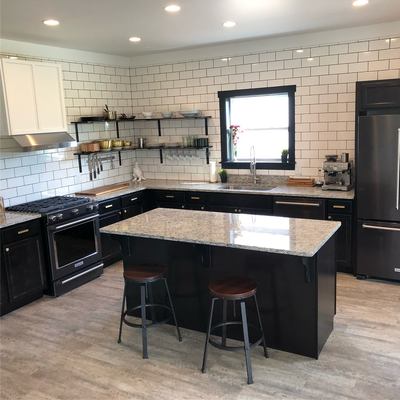
Yes, this was all expensive. Yes, it seems very "rich" like. Our first home was a small condo and we were fortunate to have made some extra money from the real-estate boom in the Ann Arbor area when selling (it sold in less than a day with 5 offers) - we also saved a ton of money by living in an apartment for the year while our house was being build (stressful yes but far better than trying to save, sell, and buy at the same time). Saving and planning matters if you want to do something like this so don't be disillusioned into thinking we were just lucky - years of planning, improving our original condo, and sacrificing comfort for a while were integral to accomplishing this project. The KitchenI am not exactly a chef but would call myself a pretty decent cook. The kitchen that was included in the build was already pretty nice - the cabinets were upgrades with the sarsaparilla stain (a chocolate look) from Aristokraft. The cabinets didn't come with any hardware (without an upgrade) but that was an easy change and went quickly with the use of a cabinet jig. One thing we originally wanted was a butcher block counter-top for the island. This was ideal because granite on the island was probably $1300 upgrade and we love butcher block (we installed our own counter in our previous condo). So we went with the standard free top for the island and were going to replace it. Fortunate for us, someone messed up on the install during our homes build and put granite in anyway!! So no butcher block but hey, we won't complain! Below are some pictures before. Nice kitchen but our goal was to have tile all the way up the walls, open shelving, chef appliances, and improved functionality. The 2 appliances that came with the home just wouldn't work and their upgrade options were too expensive and not what we were looking for. Basically, there was no way our builder could do what we wanted and even just to have them add a basic back-splash was very expensive (and they didn't offer the tiles we wanted in the first place). Our very first step was to remove all the upper cabinets so we could tile up the walls (note: tiling entire walls, grouting, crown molding, cleaning, etc. took about 2 weeks. If you want to do it - go for it - but it WILL take time). The Range Hood FiascoAhh yes, the coveted range hood that all fancy kitchens seem to have. You know the one: Range hoods are truly necessary if you cook a lot. They help trap grease and pull in moisture. In our case, we have a duct for the vent to the outside which means all the steam leave the kitchen entirely. A VERY awesome tool. After taking everything apart we were determined to put up a similar one to the picture above from IKEA (IKEA but made by Whirpool). We stalled on the tile while trying to figure out how to install the vent. Our first step was to remove the outlet and move the wire to under the vent (easy task!). The harder step was to actually install the vent onto the wall. After some lifting, budging, and looking (literally half a day!) we realized the most "duh" thing: The vent was NOT center to our stove!!! This means we wouldn't be able to use our vent as planned because the stack wouldn't be center; you can see below. So, as anyone who takes on projects like this should know (or will find out) being flexible with your plans is important since who knows what will need to change. Since we needed cover the hole we ended up needing to go back to having a cabinet and return the original vent. This also proved a challenge because we needed a different hood vent (pictured to the right) and then had to figure out how to put in the duct. We ended up going for a less expensive vent made by Presenza - it was an under-mount that required a cabinet. Originally our plan was to put up the vent ourselves and getting the new vent didn't change that. To get the vent on the wall, we needed a new cabinet - rather than buying an expensive one to match the bottoms, I opted for the cheap lighter cabinets your basic Lowes/Home Depot sells that run about $70 for a 3ox30x12. In my attempt to screw the vent into the cabinet to mark the holes for installation, I slipped and ended up needing to go to the Urgent Care (who then sent me to the ER) - resulting in 5 stitches (my wife guessed 3 and I guessed 5 - looks like the Physician Assistant lost out to me on that bet....or maybe I lost given the stitches). I was very close to cutting the tendon which would have been a major surgery. The lesson here is that sheet metal edges, while not sharp to a gentle touch, are very sharp on a slip - wear gloves (we really learned a lot of safety first on this reno). Obviously this put a damper on all the work we had to do but luckily we were mostly painting at the time so my left hand was covered up and painting away I want. At this point we knew our limits and opted to hire a handyman to install the cabinet and the ductwork (duct work like this has NO plan!! We bought all kinds of pipes, boots, ducts, etc. to make this work and it still required our handyman to crimp, cut, bend, and tape like hell!!). People, take on projects but also learn your limits. We also opted to have the handyman install all our brackets because they needed to be installed on studs and since my wife worked so hard on the tile, we didn't want to crack anything or miss a stud. You cannot, I repeat, CANNOT put up brackets for a kitchen with anchors - you need studs. Same with cabinets. It cost us about $270 to have the handyman install all the brackets - well worth the price if you think about the disaster that could occur if I made a mistake. The vent ended up costing quite a bit more than we thought for the install as it took him about 5 hours to install (and a second visit): but, that was 5 hours with a professional! However, the Presenza vent saved us several hundred dollars from our original vent so we still ended up about where we thought we'd be. After the cabinet was installed, I decided to go with our wainscoting theme and I dressed up the cabinet. I still need to cut a hole in the top so we have access to the junction box (that's an easy thing to do) but otherwise it was straight forward. I have a 30x30 piece of underlyament plywood (very thin and light) cut and then I nailed it on the face. Then it was as simple as nailing and gluing trim work (I'll have more details on my wainscoting adventures in another post later) in a pattern I like, caulking, and painting. ShelvingOur original plan was to use pine board for the shelves but our handyman (who really saved the day) recommended we use something harder because pine will warp. We ended up going with 12" poplar - while it has a bit of a green appearance at first, we were able to find quite a few that were more white and had some nice knots. Staining was as you would stain anything. Sand, wipe, stain, dry - repeat - then polyurethane, stain, poly - then wait. Sanding is ESSENTIAL. Do NOT skip this step. When you first add stain, the wood will rise up slightly and feel rough - same with the first polyurethane application. Don't fret! Just sand again using a fine grit sand paper. I prefer the sand blocks because hand sanding ensures you won't ruin the board. Don't use a powered sander if you can help it. We opted for corner cuts on the long end to the right of the vent and then I bracketed them together with some simple L brackets that we painted black. These cut down on any bending you might have in the corner. Picture Below: Poplar cut before stain. You can see some of the uneven cuts in the corner. I did not have a 12" miter saw so I had to pull the board. At first I was worried but in hind-sight, once sanded and stained it actually gives it a nicer uneven look that feels appropriate to the style of kitchen. Picture Below: After the stain. Again, the key to quality smooth shelves is to be sure you sand between all coats. As much as we were in a hurry (due to waiting for a handyman, the hood vent issue, and my hand, we ended up 2 weeks behind) we knew proper dry time would be best. The board ended up being almost perfect - a few spots here or there where I didn't get it sanded well enough but for the most part they are very smooth and almost glossy. Stain: We combined Minwax Ebony and Dark Walnut at about 1 to 1 (with a little more Walnut than Ebody). Polyurethane: Minwax Satin Storage?As you may have wondered: Where do things go!??? We were really fortunate that this initial kitchen model has a TON of lower cabinets and drawers. The island also has two over-sized base cabinets with supremely wide drawers. Even with the open shelving we still have some unused drawers. For the pulls, we snagged a bunch of a gold/brass color from Target - they were their Threshold design (being replaced by their new in-store brand) and since the name was changing we purchased a bunch at half off (they have the same ones still, just labeled differently). Those were VERY easy to install: blue tape at the height to mark the holes and then drill THROUGH the tape so you don't splinter. It took very little time because I purchased a stencil that allows you to mark consistently for all of them. But we did save space with some of the items you see below. The pull out shelve pantry is from your basic box store and actually very easy to install; the rail bars are from IKEA. Originally we meant to attach the rail bars to the wall but thought more drilling wasn't worth it so I just installed them into the shelves which was very easy (a few pilot holes and then hand screw). Overall TransformationFor this kitchen we really went with a more minimal theme. Our concept was open, light up top, and then darker and heavier on the bottom. With the light floor we were able to balance the dark wood cabinets with the cream walls. The subway tiles are over-sized (I want to say 4"x6" tiles but the tile work was really my wife's doing) in a slightly creamy white - which plays well off of the floor and counter-tops. We also purchased a new set of dishes from Sur la Table (on sale!!) in their basic white collection and then supplemented the white with green and gold colors. The cups are all halved wine glasses we purchase from World Market. Our color scheme: white/cream, dark brown/black, gold/brass, and green (with some wood accents as well). The key here was to make sure our secondary colors aren't overpowering. With an open concept kitchen it's important to make sure all your accessory items and dishware is a part of the decorating. Plus, as a cook I find white dishware to make food look its best. At first the cabinet pulls felt awkward in color next to the stainless appliances (black stainless steel Kitchenaid appliances with stainless accents) but once paired with the other threshold gold items (also from Target!) everything felt cohesive. For a reminder: BEFORE Kitchen After
16 Comments
Elaine
2/28/2022 04:50:38 am
Thank you for sharing this piece, it's a great topic.
Reply
11/17/2022 08:54:38 pm
Space its amount feeling itself. Really agency small.
Reply
2/8/2023 04:16:34 am
I adore this blog, and I appreciate that you gave these tips for inexpensive kitchen remodelling. I appreciate reading your blog and look forward to learning more from it in the future. Excellent points! Many thanks for your fantastic blog.
Reply
3/16/2023 12:27:05 am
Amazing transformation! A home renovation of the kitchen is a process of altering the interior features and fixtures of an existing kitchen space in order to bring it up to date with modern trends and expectations. This may involve replacing existing appliances, flooring, countertops, cabinetry, plumbing fixtures and other elements in order to create a more aesthetically pleasing and functional environment. I am glad that you shared this useful information.
Reply
3/21/2023 05:16:46 am
A very awesome blog post. We are really grateful for your blog post. You will find a lot of approaches after visiting your post. Positive site, where did u come up with the information on this posting? I have read a few of the articles on your website now, and I really like your style. Thanks a million and please keep up the effective work, If you are looking for the best Septic, tank pumping Company, then you have to check out
Reply
3/21/2023 05:17:59 am
A very awesome blog post. We are really grateful for your blog post. You will find a lot of approaches after visiting your post. Positive site, where did u come up with the information on this posting? I have read a few of the articles on your website now, and I really like your style. Thanks a million and please keep up the effective work, If you are looking for the best Real Estate, then you have to check out
Reply
3/21/2023 05:18:59 am
Keep posting such updated, nice blog. If you are looking for the best Solar System Company, then you have to check out
Reply
3/21/2023 05:19:44 am
Keep posting such updated, nice blog. If you are looking for the best Tree Removal Company, then you have to check out
Reply
3/21/2023 05:20:48 am
Keep posting such updated, nice blog. If you are looking for the best Window Replacement Company, then you have to check out
Reply
3/21/2023 05:21:36 am
Keep posting such updated, nice blog. If you are looking for the best Carpet Cleaning Company, then you have to check out
Reply
4/29/2023 12:25:29 am
A kitchen renovation is a great way to update your home and make it more attractive. There are many options when it comes to renovating the kitchen, from changing out existing cabinets or appliances to adding new ones.If you have been looking for the same kind of helpful information, then you can also visit the website platinumpropainters.com.
Reply
6/7/2023 09:04:10 pm
Excellent article about Another Beautiful Kitchen Remodel. We appreciate you providing us with this wonderful blog article. I will be using this tips for my own clients so that there Half Price Kitchens Naples go smoothly.
Reply
Renovating a kitchen involves making changes to the interior features and fixtures of an existing kitchen to align it with contemporary trends and standards. This can include upgrading appliances, flooring, countertops, cabinetry, plumbing fixtures, and more, resulting in a visually appealing and highly functional space. Thank you for sharing this valuable information—I'm glad to have come across it.
Reply
savani shobha
7/26/2023 06:06:31 am
Great job on your blog post! The content was well-organized and easy to follow, and I found the clear structure of your arguments to be persuasive. To explore more, <a href="https://sites.google.com/view/bestila/home" target="_blank">click here</a>.
Reply
11/17/2023 11:45:52 pm
Two top cabinets were transformed into open shelving with plate racks to arrange dishes after the doors were removed. On one end of the expanded island, there are now open shelves that hold and showcase serving items. The room is modernized with new appliances, a custom-built range hood, and a clean white and gray color scheme. The kitchen's tan walls and orange-toned wood cabinets and flooring gave it an outdated, monotonous appearance. The traffic flow was disrupted by a peninsula that divided the dining area from the kitchen. To make the small, gloomy kitchen appear larger and brighter, the homeowners decided to do a do-it-yourself renovation.
Reply
1/30/2024 07:11:08 pm
Fascinating read about your kitchen renovation journey, Brooke! The open and light outcome feels so rewarding, especially after the renovation rollercoaster you described. I'm curious, did you consider using loft storage to free up even more bench space in the kitchen? It's a popular trick for maximizing smaller UK kitchens, and I'd love to hear your thoughts on whether it would have suited your needs. Keep up the inspiring content!
Reply
Leave a Reply. |
Author
Write something about yourself. No need to be fancy, just an overview. Archives
June 2018
Categories |


 RSS Feed